Adding a Posts Element
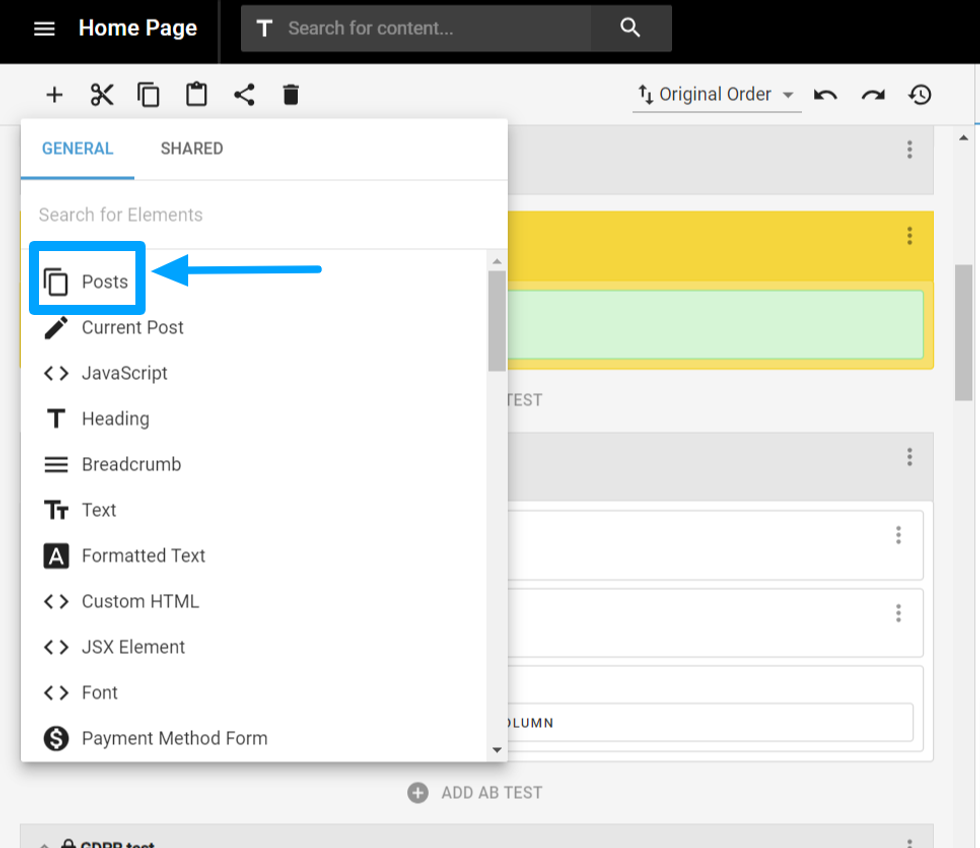
A home page will generally use a selection of elements from within the L&D to populate content, ads, widgets, and shared elements such as a top bar. Let’s start with the Posts element. A Posts element allows you to select what content will appear in a certain location within your home page. You are also able to select how many articles will appear in a certain location, as well as many ways to filter the content that is shown.
To add a Posts element, click on the + sign in the top toolbar in the L&D and click on Posts. You’ll now see a Posts element in the interface, and it will be highlighted so it’s clear that is the element you are working on. By default, the Posts element will contain 1 post and it will be the most recent post created.
Customizing a Posts Element
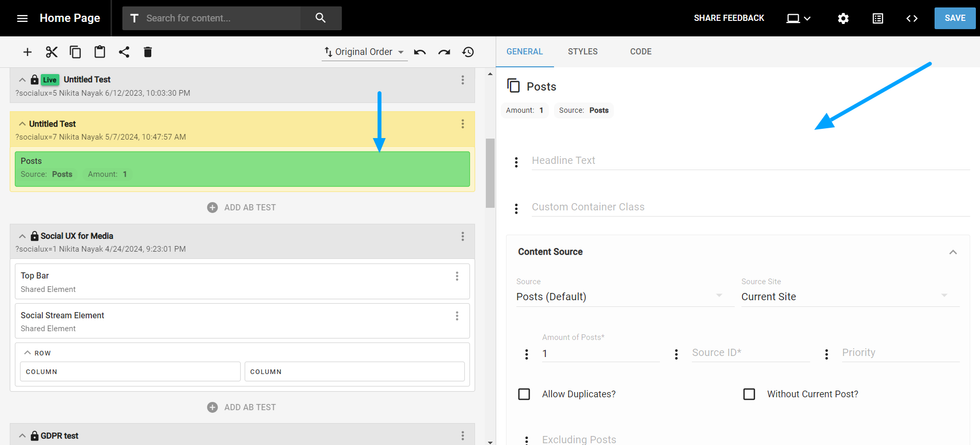
The right side panel allows you to customize the individual elements you apply to the page. We’ll cover the types of customizations you can perform in detail.
Content Source
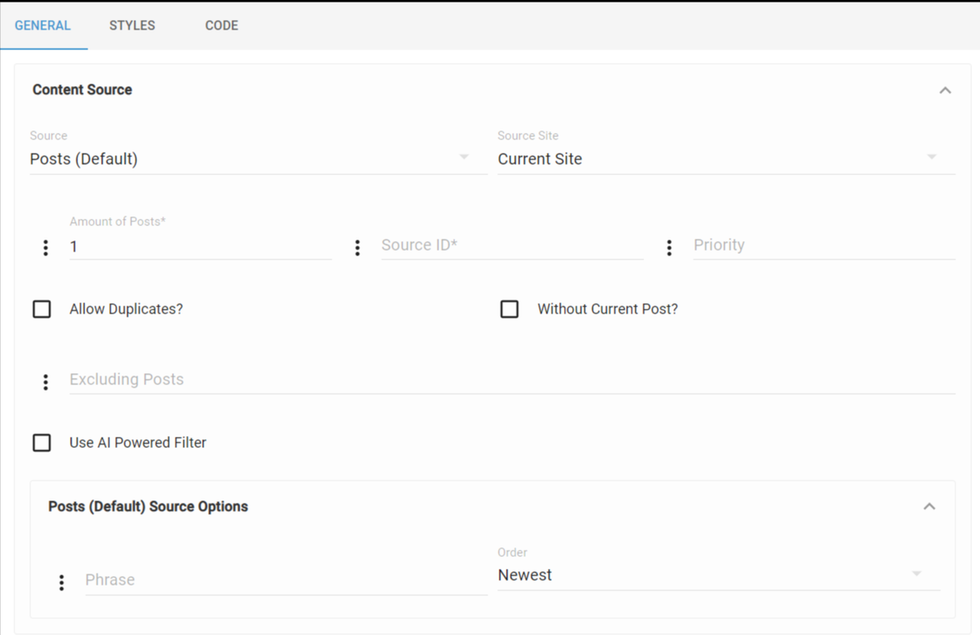
This section is to specify the main details about a Posts element. You are able to specify the amount of posts, the priority of their loading, whether duplicates are allowed, and so on.
Source
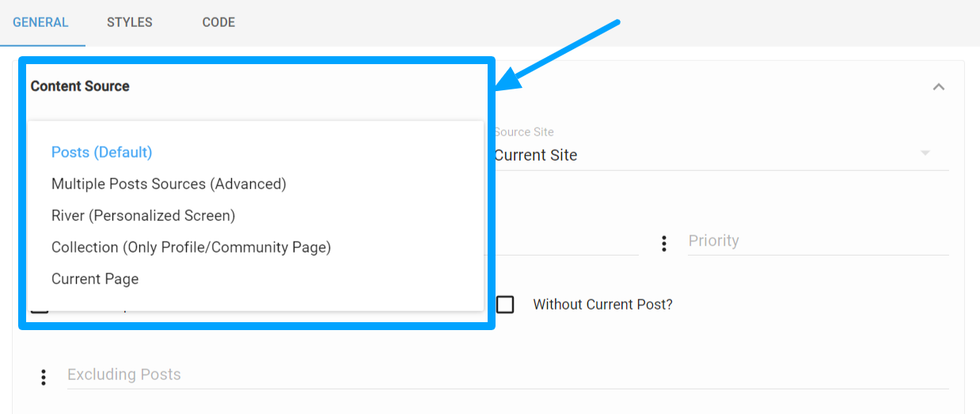
For this example, we’ll only be examining the Posts (default) option. This selection will specify that posts from the website will be used in the element. The remaining options are for more advanced setups and are discussed elsewhere.
Source Site
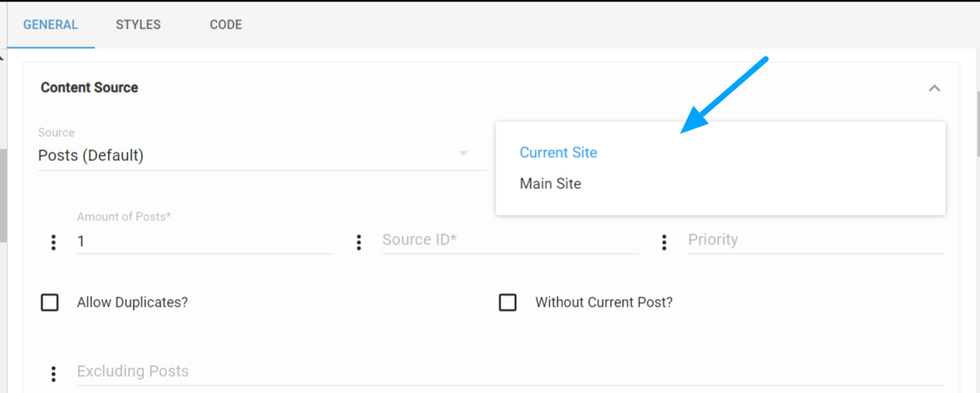
For this example, we’ll be using the selection Current Site. This specifies that the content will be pulled from the active site. The Main Site option is designed for site networks, allowing posts to be pulled exclusively from the main site.
Amount of Posts
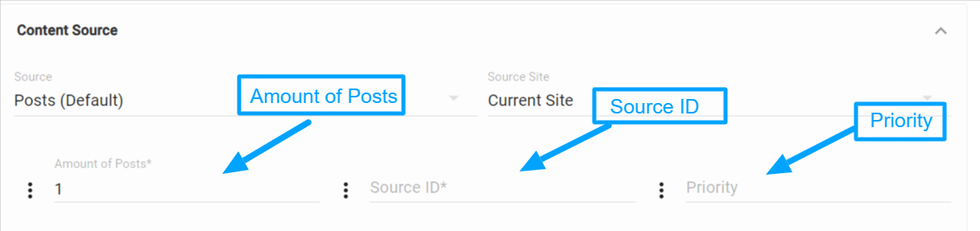
This allows you to select the amount of posts that will be included in the element. This is useful for organizing the home page into the article lists that you want to present. For example, you may want to have one Posts element that is a full bleed element showing only one post at the top of the page. You may then have another Posts element below that pulls three articles from a specific section, followed by another Posts element showing three more articles from a different section. The organization of the articles on the home page is limitless and can be a powerful way to show content from different segments of your site.
Source ID
When you are grouping content into a Posts element, you are able to specify the Source ID. This allows you to reuse that Source ID to maintain the specificity of the content across the page.
Priority
This sets the priority of loading content into a specific Posts element. The higher the number, the higher the priority of loading the content. This can be helpful if there is content that could potentially be loaded into any of the Posts elements on the page. Setting a higher priority for one element over another ensures that the posts will appear in the higher priority element than a lower priority element.
Allow Duplicates
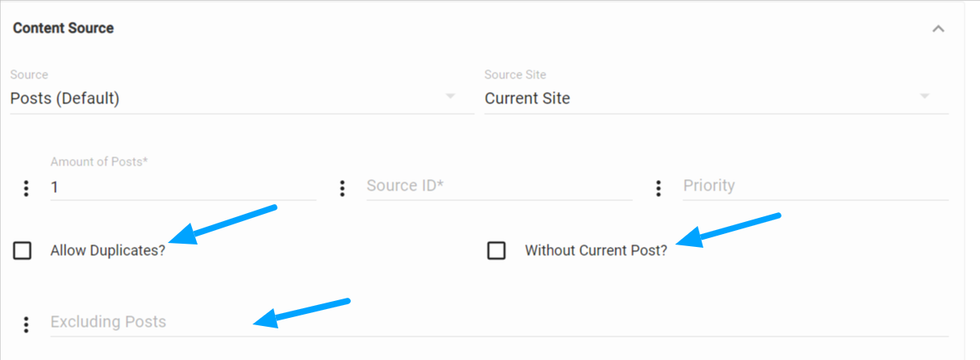
This is a check box that specifies if content can be duplicated in an element. If the box is not selected content will not be duplicated. This means that if an article appears in one Posts element, it will not be shown again in a separate element. If the box is selected, it will allow for content to be duplicated in the element.
Without Current Post
This selection is not relevant to a home page Posts element, but is important for an article page. If the box is selected, then the article a user lands on can be duplicated elsewhere on the page.
Excluding Posts
This allows you to specify individual posts that should not be shown in the Posts element. Simply add the post IDs separated by commas to specify the content that should not be shown.
AI powered Filter
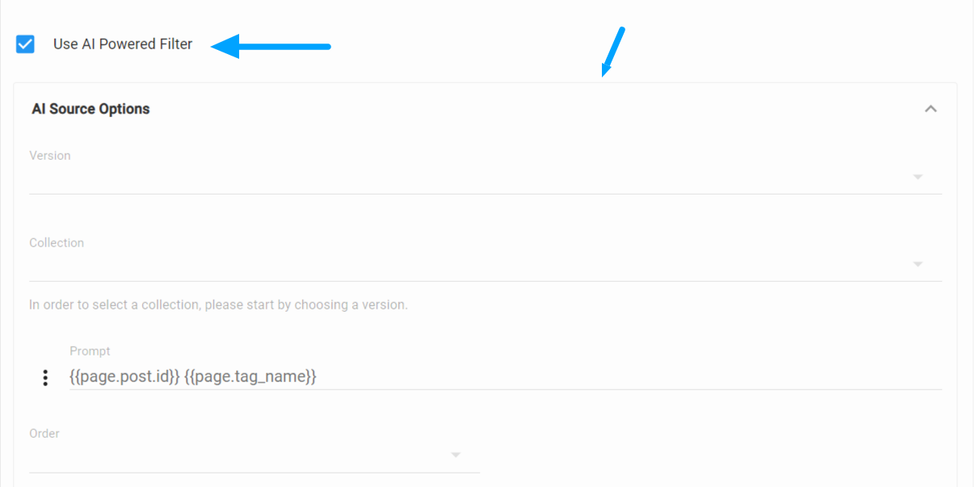
This feature employs artificial intelligence to filter content based on specified prompts. For basic filtering, you can select the AI version and choose the embeddings collection of posts. Then, provide a prompt to filter out articles from the collection. Additionally, you have the option to sort the articles based on various criteria, including pageviews, similarities, newest published date, and modified date of the article.
Filters
This subsection of the right-side panel allows you to specifically filter the content that is shown in a Posts element. Remember, by default the content will pull the most recent content that has been published, but there are numerous ways you can customize the content that will be seen in a specific Posts element.
Filter by Sections
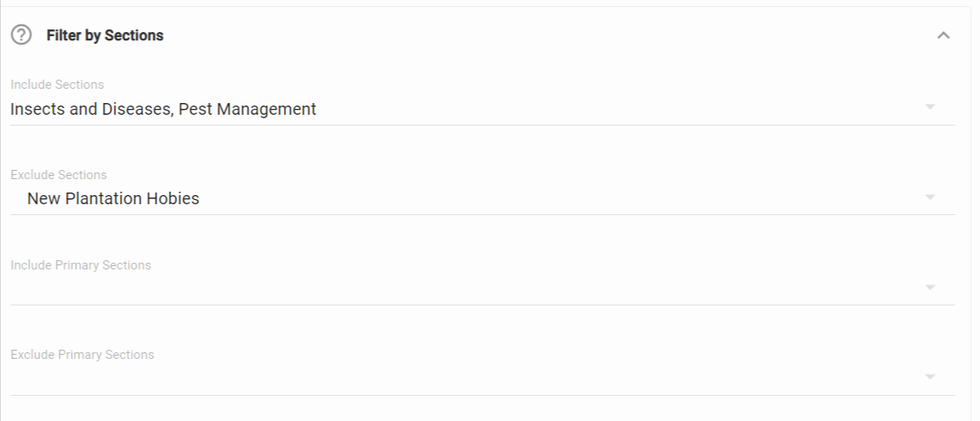
This filter allows you to include or exclude individual sections from a Posts element. You can select from a dropdown list what sections to include or exclude. For example, you may have a Posts element that you want to show content from the sections for Sports and Technology, but not from the section Local. Simply select from the include dropdown the sections you want to include, and select from the exclude dropdown the sections you want to exclude. You also have the option to specify a primary section.
Filter by Current Post
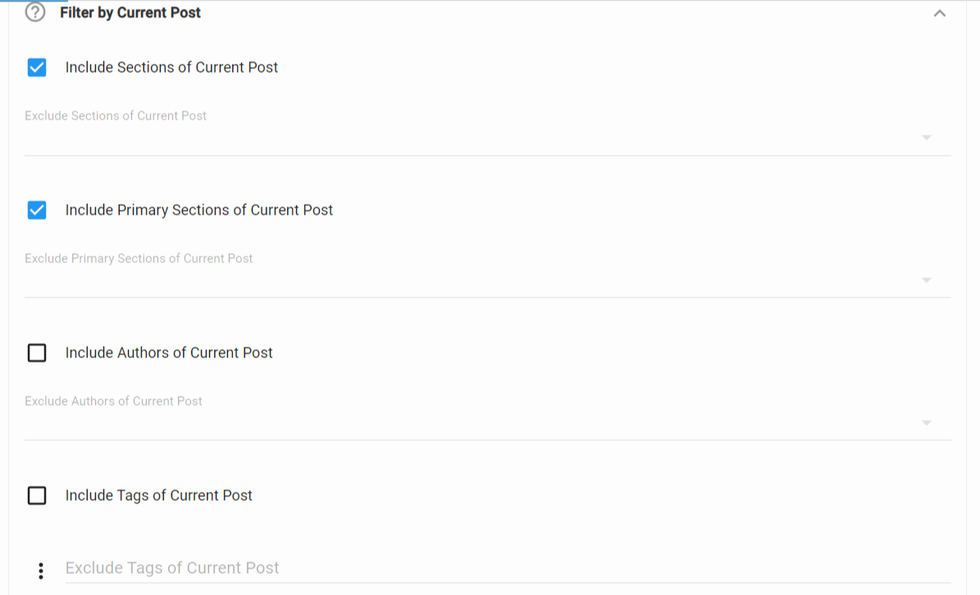
This filter allows you to include content based on the data of an article page. This is more relevant to a post page than the home page, as the home page does not have an individual articles as it’s main entity. We will cover this filter in the Post Page tutorial.
Filter by Tags
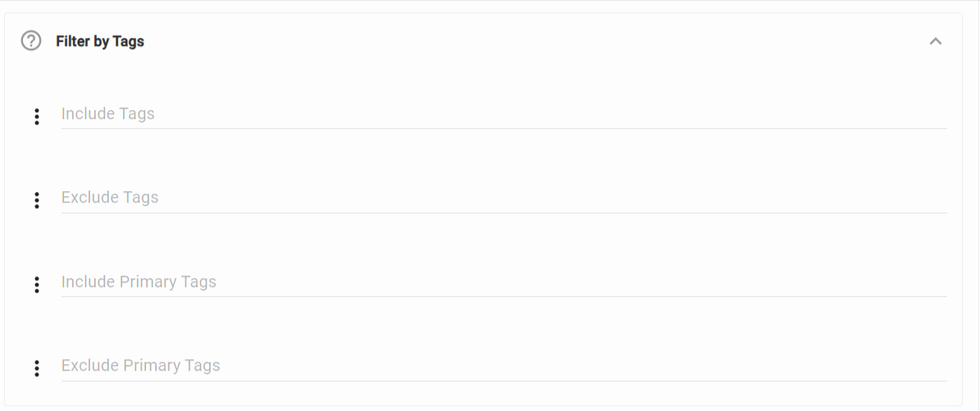
This filter is the same as the sections filter, but works with tags, both primary and regular variety. You can filter by including tags and excluding those you do not want to have appear in the element.
Filter by Author
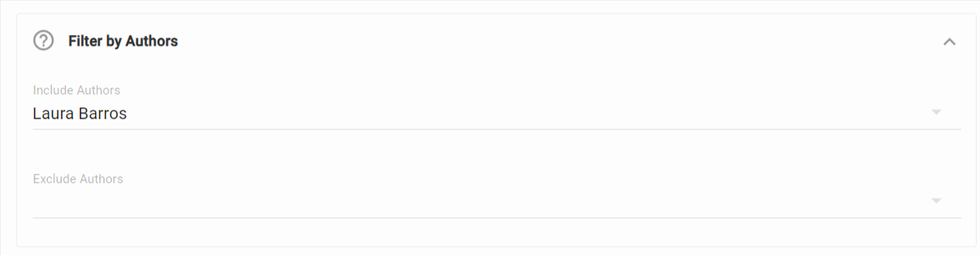
This filter allows you to filter either by including an author or excluding an author. You can select multiple authors to either include or exclude.
Filter by Post ID

This filter allows you to add specific posts to be shown in a specific Posts element. You can add in a comma-separated list of posts to be shown if you are showing multiple posts.
Filter by Type

This filter allows you to only show posts that are of a specific type. For instance, you may have blog posts, product posts, and breaking news posts. You may choose to include only blog posts and exclude product and breaking posts within a Posts element, for example.
Filter by Statuses
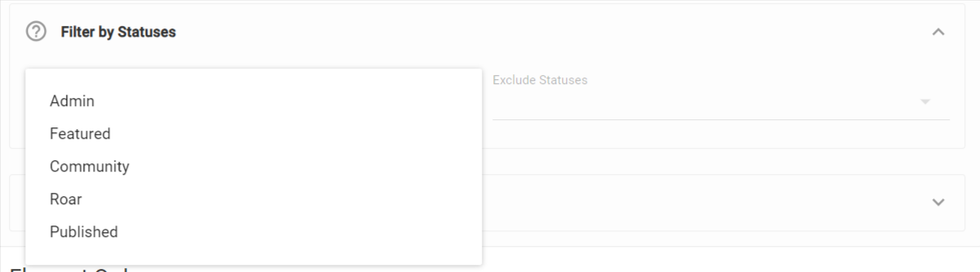
This functionality enables you to filter articles based on specific criteria such as whether the article is created by an Admin, marked as featured, associated with a particular community, or already published.
Filter by Period
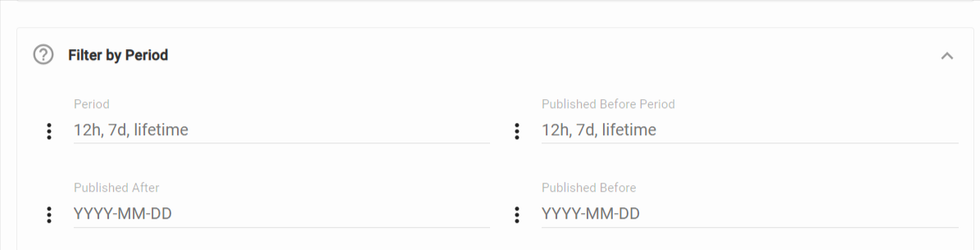
This filter allows you to select a specific time frame from when to show posts. You may select a specific time frame to chose from (such as January 1 through January 31), or articles published either before a specific date or after a specific date.
Note on Filter Combinations
You can select multiple filters for any Posts element. For instance, you may select that you will show 6 posts from the entertainment section on your site. These posts can then be further filtered as written by author X or Y, but not author Z. A final filter may be added that the posts should be no more than 2 weeks old. The flexibility of what posts to show within a Posts element is quite large.
Element Order

The Element Order feature allows you to organize the data that you want to appear on the Posts element. There is a long list of data associated with any individual post, such as the headline, subheadline, author, date published, social share buttons, photo credit, photo caption, and so on. We make it easy to define where these will appear on each individual post element. For each element you want to expose, you simply select from the dropdown associated with it if it should be shown on top, below, to the left, the right, or overlaid on top of the article image.
Spacing
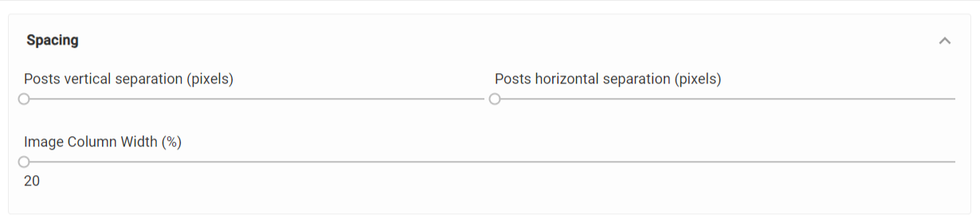
The spacing feature allows you to add padding around the posts.
Image Ratio
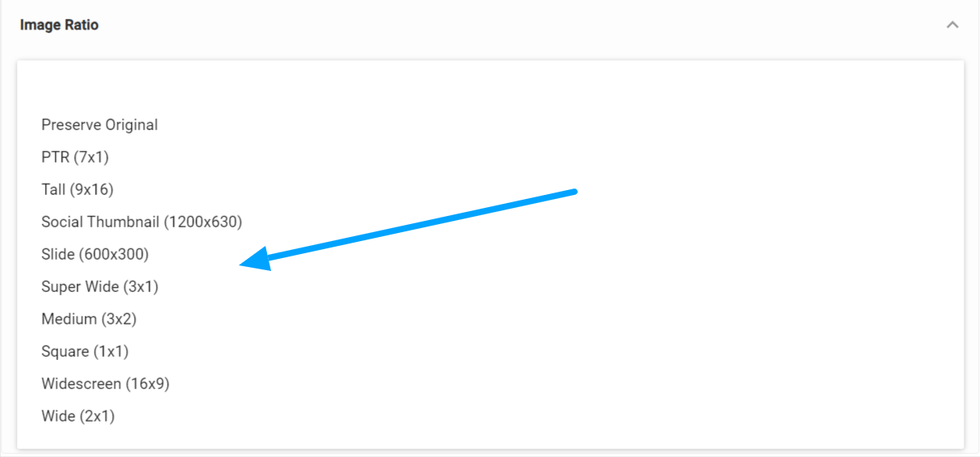
The image ratio selector allows you to select the default image ratio you want for each posts element. You may select from the dropdown menu what ratio you prefer. You may also opt to preserve the ratio of the original image if you do not want to have a consistent ratio applied to all images within a Posts element.You can also select image ratios for specific devices within the lower dropdown menu.
Styling Individual Elements
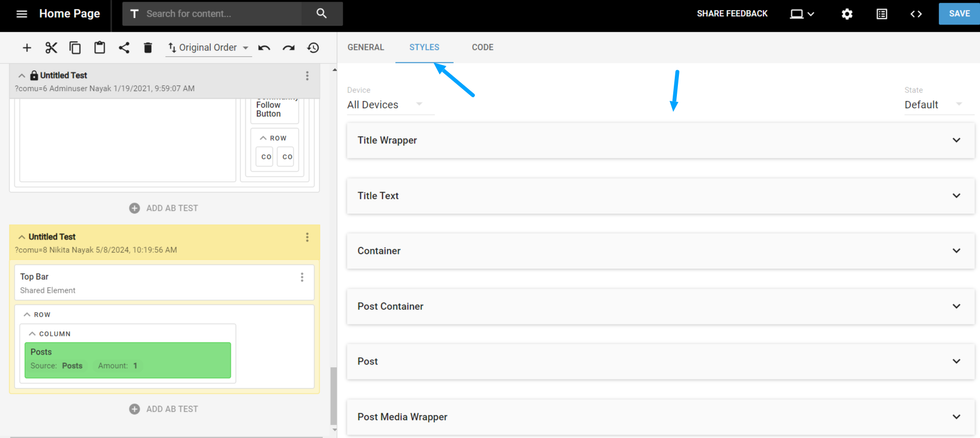
The second tab in the right-side panel is for styling updates to individual elements. When you click on the Styles tab, you will see a listing of all aspects of the element. Note that this applies to all elements we will discuss, not just the Posts element we are examining here.
For each individual aspect of an element (for example, headline, author name, body, date, etc.) we will show the applicable CSS classes (font, color, margins, padding, etc.) to that aspect and you can either use an open field to input the styling that you wish to add, or directly input the CSS that you wish to apply.
Accessing the Code
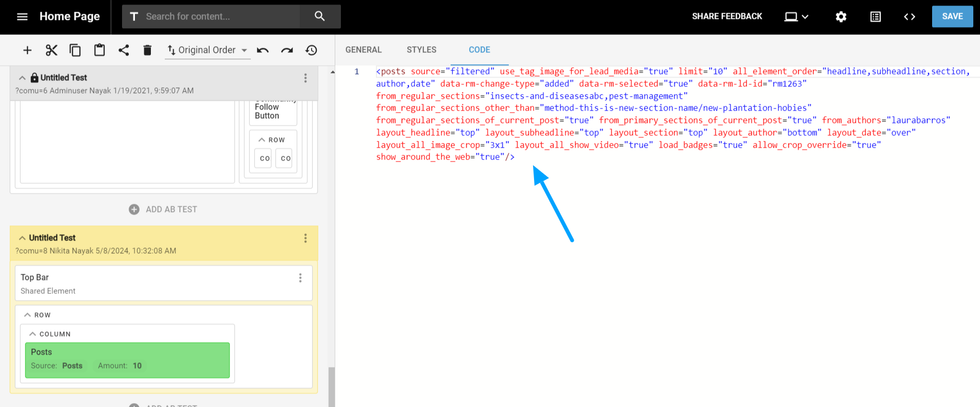
The final, right-most tab on the right-side interface is the code tab. You can select this tab and directly view and edit the code of the element.
Table of Contents
- Adding a Posts Element
- Customizing a Posts Element
- Content Source
- Source
- Source Site
- Amount of Posts
- Source ID
- Priority
- Allow Duplicates
- Without Current Post
- Excluding Posts
- AI powered Filter
- Filters
- Filter by Sections
- Filter by Current Post
- Filter by Tags
- Filter by Author
- Filter by Post ID
- Filter by Type
- Filter by Statuses
- Filter by Period
- Note on Filter Combinations
- Element Order
- Spacing
- Image Ratio
- Styling Individual Elements
- Accessing the Code


© 2025 RebelMouse. All rights reserved.
Comments Moderation Tools