When used in a smart way, pop-up forms can be a powerful tool for growing audiences, generating leads, and creating loyalty.
If you have a Mailchimp account, you can easily set up a pop-up form on your RebelMouse site by following these simple steps:
1.First, connect your website to publish your pop-up form on your site.
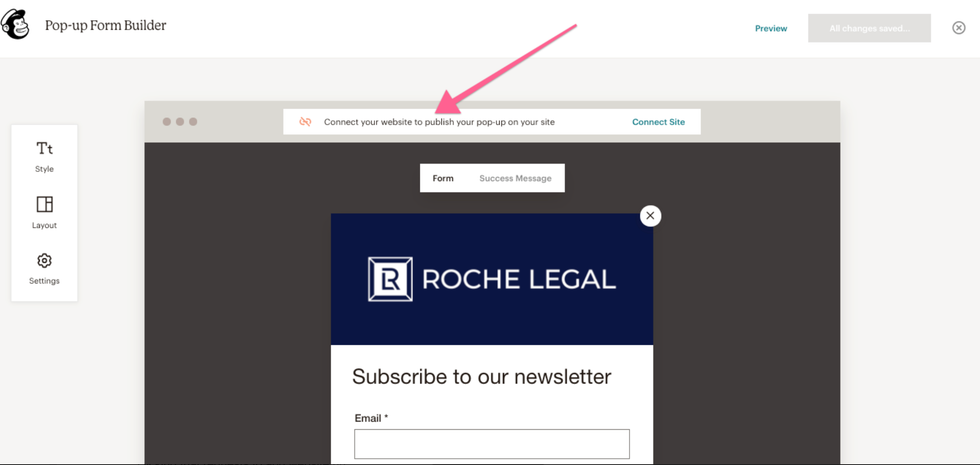
You will find a prompt to connect your site in the pop-up form builder.
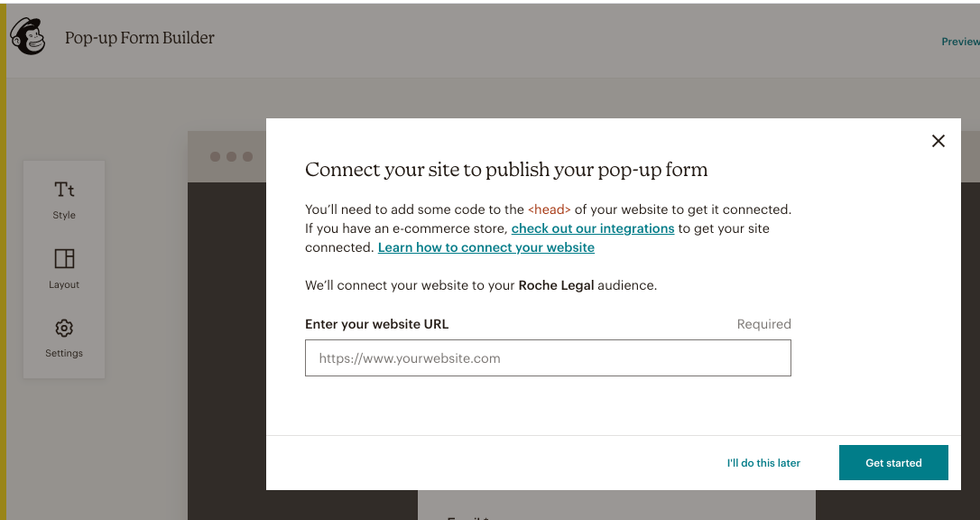
2.Then, enter your website URL and click "Get started."
3.Next, copy the snippet of code that Mailchimp generates.
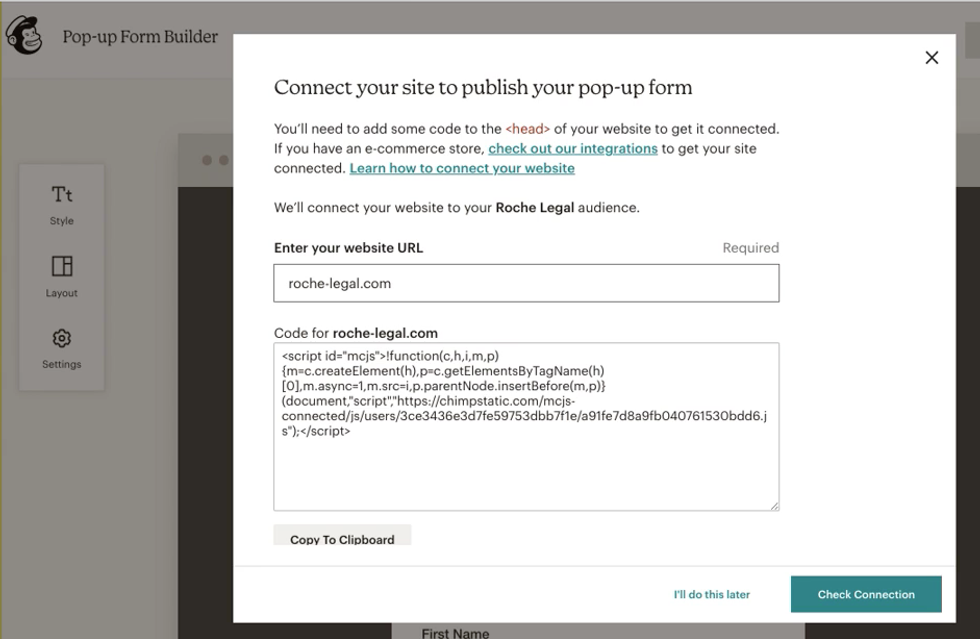
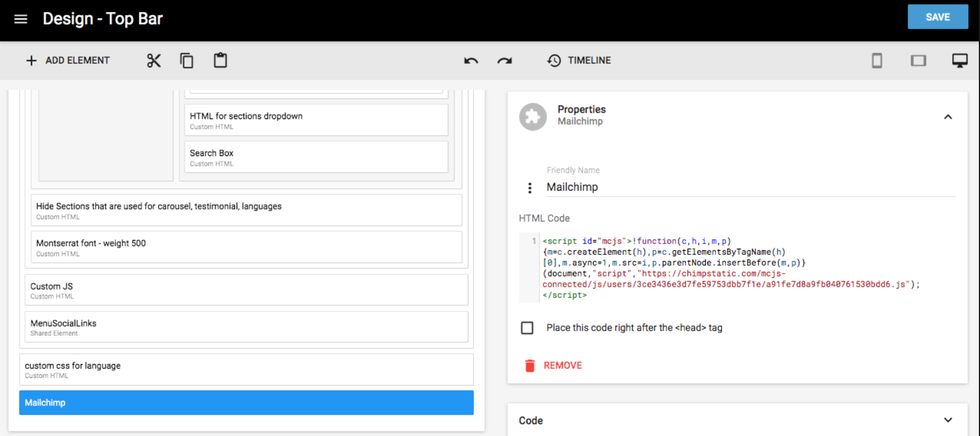
You will need to paste this code in Layout & Design Tool.
4.Paste the code in the Top Bar of the Header Code element in Layout & Design Tool.
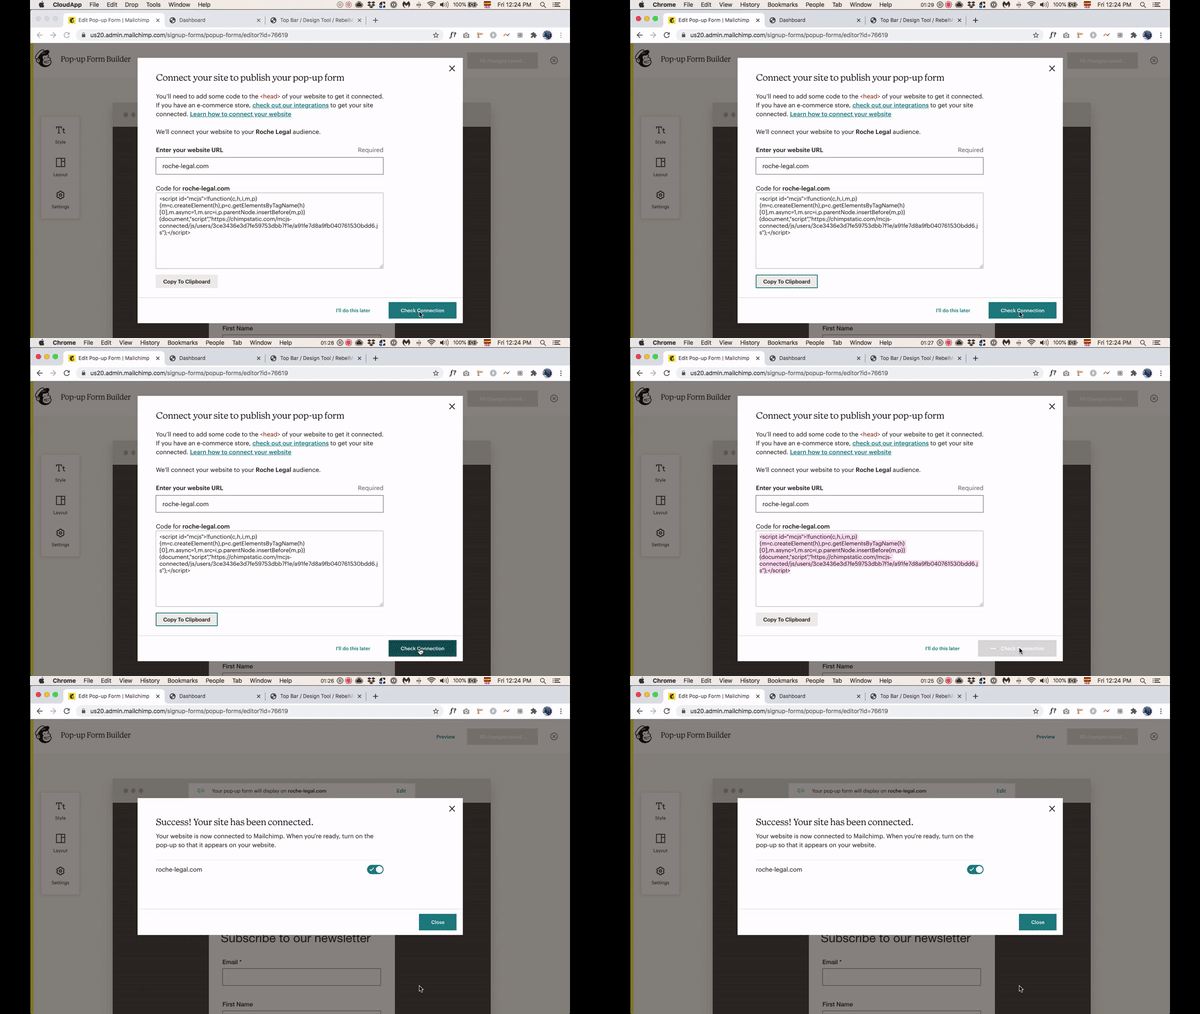
5.To finalize, click the green "Check Connection" button in Mailchimp.
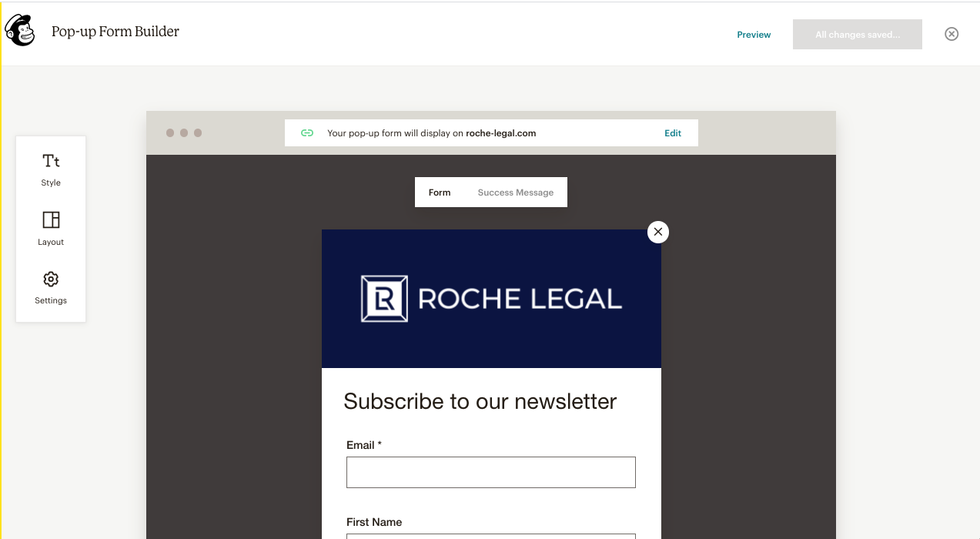
6.This is how the Mailchimp form builder will look once your site is connected.
8.Choose the list you want to work with and select "Signup forms."

Click the drop-down menu next to the list you want to work with, and choose Signup forms.
9.Choose "Subscriber pop-up."

10.Customize the form.

After you've chosen Subscriber pop-up, you'll have a variety of options to customize your pop-up in the form builder.
You can navigate between three tabs to create your form:
- Design
- Fields
- Content
This is where you'll choose the format of your pop-up form, as well as when it should be displayed to people who visit your site. You can also add and style field labels, call-to-action buttons, and custom messaging.
To help grow your subscriber list, the pop-up form is set to single opt-in by default. If you prefer, you can make your form double opt-in at anytime.
To customize your pop-up form, follow these next steps.
11.Use the "Design" tab to create the form's format.

You can choose between:
- Modal to display the form in the center of your site.
- Slide to have the form slide in and display in a fixed position on the bottom-righthand side of your site.
- Fixed to display the form in a fixed position at the bottom of your site. This format only shows an email address field and body text on your form. Choose another format to display additional fields, footer text, or an image.
12.Use the "Design" tab to adjust when the form displays.

Click the Display drop-down menu to choose when your form should appear to people who visit your site.
13.Use the "Design" tab to adjust styling elements.
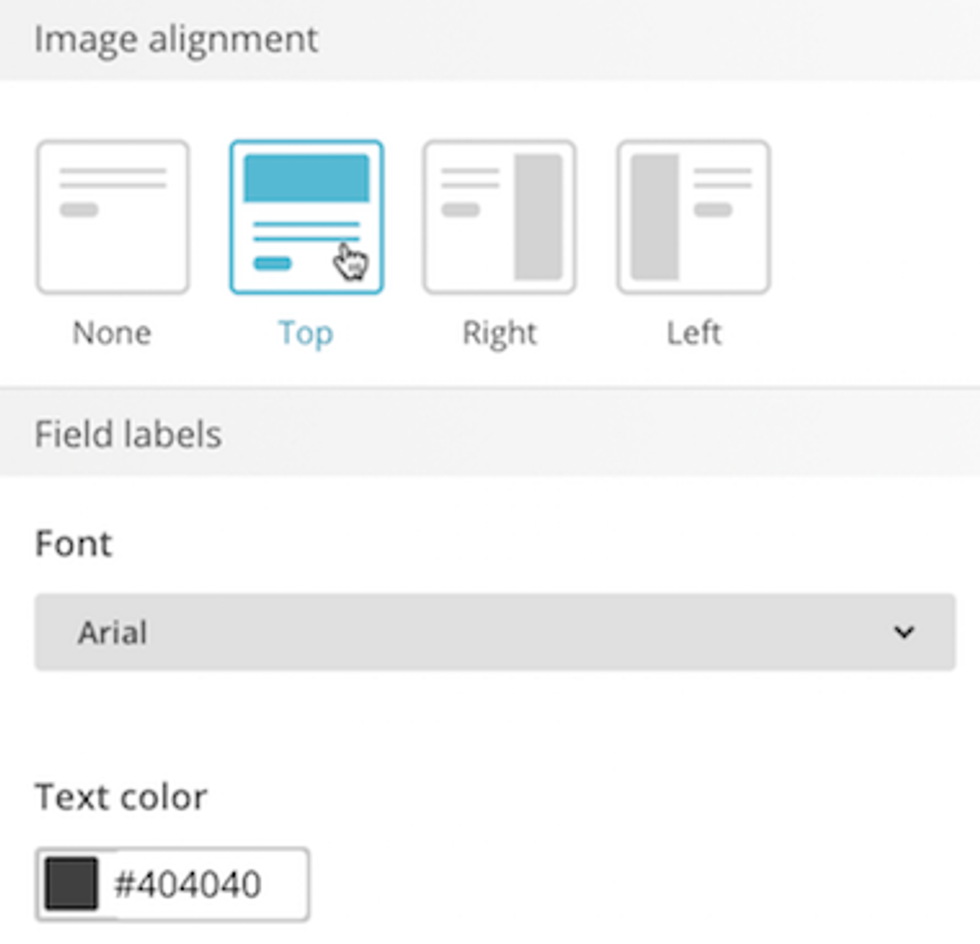
You can set image alignment and styles for the field labels, button, and pop-up modal here.
14.Use the "Fields" tab to choose the fields you want to show on your form.
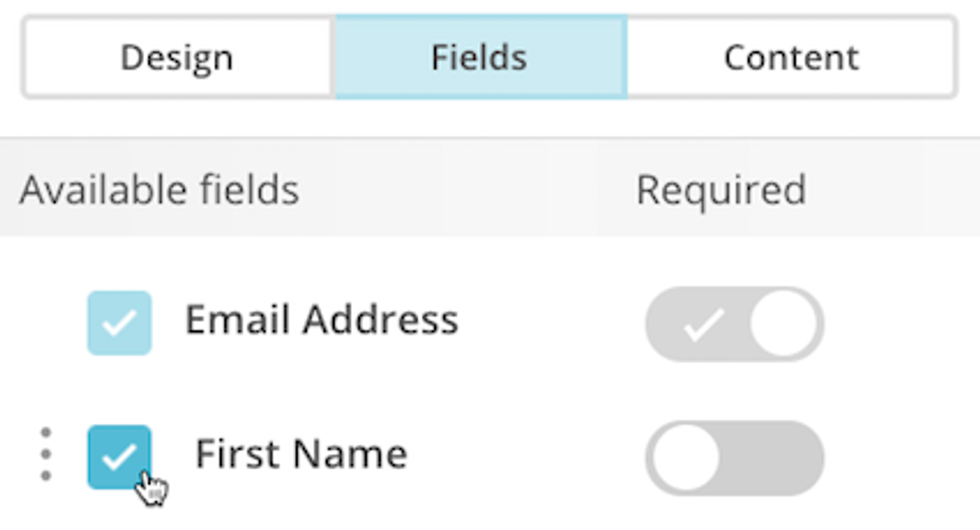
Check the box next to each field you want to include in your form.
To require a field, toggle the Required slider on (it'll display a checkmark).
15.Use the "Fields" tab to reorder your fields.
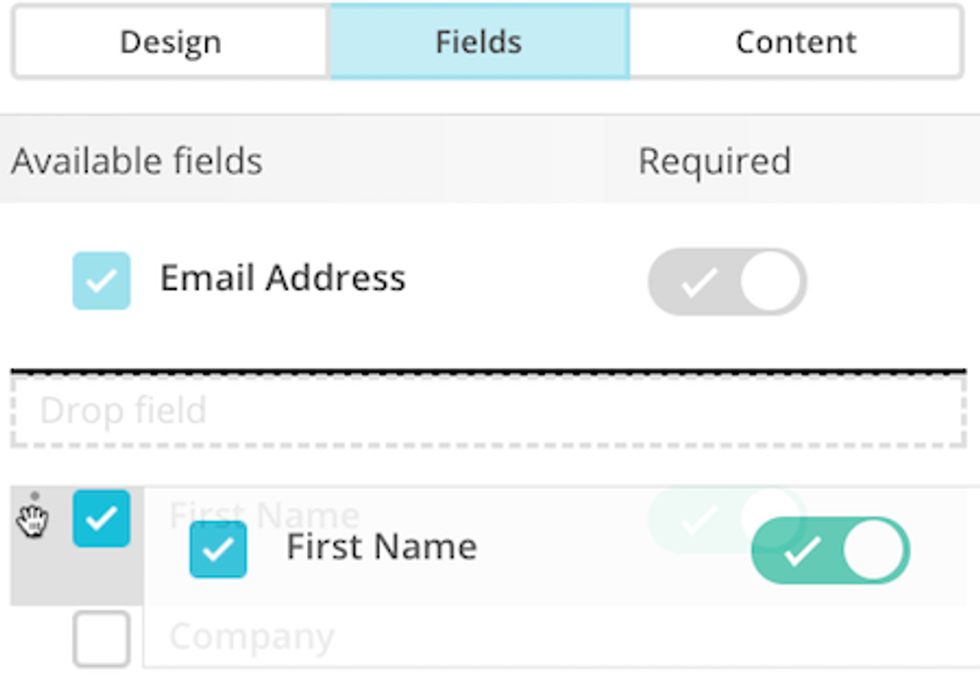
To reorder a field, click the More Options icon (three dots) next to it and drag the field to where you want it to appear in your form.
16. Use the "Content" tab to add images and text.
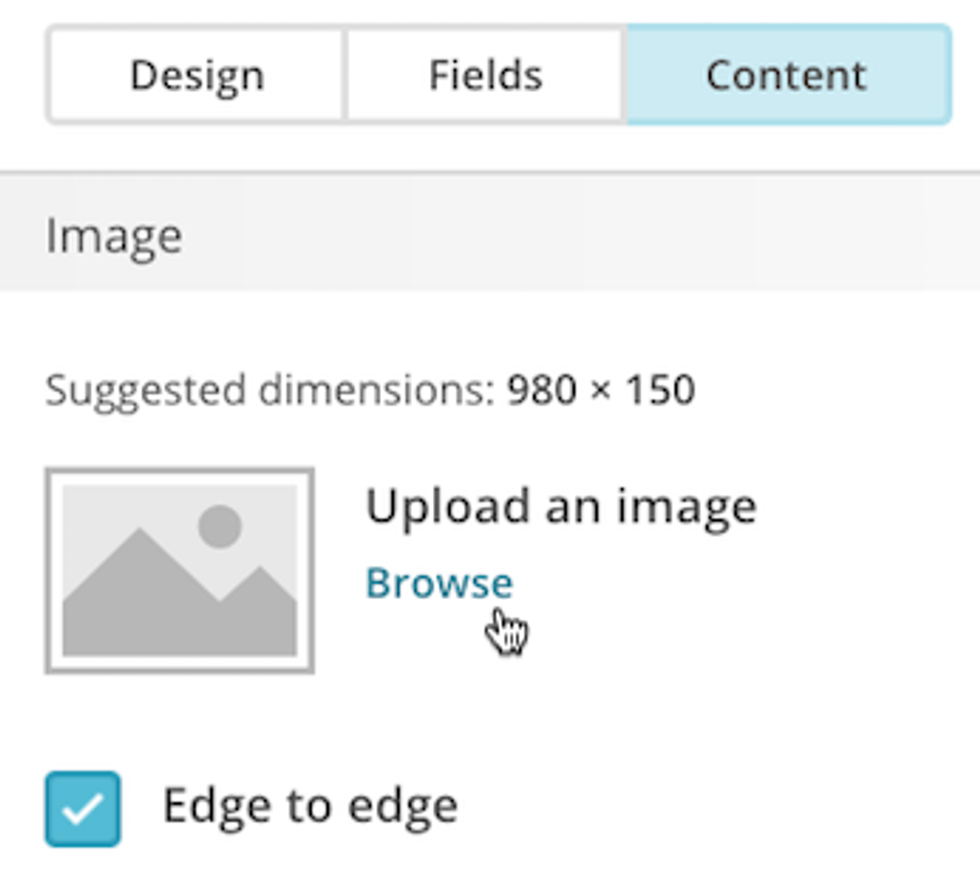
Add the image and text you want to include in your pop-up form.
17. Review how your pop-up form looks on mobile devices.

You can make sure your pop-up form is mobile-friendly here.
18. Preview the banner.

To comply with mobile best practices, MailChimp defaults to a banner when your form is viewed on a mobile device. Visitors can tap the banner button to access your form.
19. Generate the code for your form.

When you're happy with how your pop-up looks, click the Generate Code button in the bottom-righthand corner.
20. Log in to your RebelMouse site and navigate to the "Top Bar" element in the Layout and Design tool.

- Once you're logged in, choose the Layout and Design tool.
- Choose the Top Bar element.
21. Create a "Custom HTML" element and paste your MailChimp code.

- Create a Custom HTML element.
- Give it a friendly name you can recognize it by, such as "MailChimp Pop-up."
- Paste the generated code from MailChimp (step 13).
- Click Save.
22. Your pop-up is now live!

Your pop-up form will display when someone visits your site. If they choose to fill out and submit your form, we'll add them to your MailChimp list.
If a visitor has previously viewed your form, MailChimp uses cookies to make sure they don't see it again for up to one year (or until they clear their cookies).
23. Need to make additional changes? Edit the form.

After you add the pop-up form's code to your site, you may need to make additional changes to the form.
To edit the form, follow these steps:
- Navigate to the Pop-up Form builder.
- Click on any tab (Design, Fields, Content) and make your adjustments.
- Click Publish.
- When the pop-up confirmation window appears, click Publish again.
24. How to remove the form.

- Navigate to the Top Bar element in the Layout and Design tool of RebelMouse.
- Remove the Custom HTML element that contains the MailChimp code. (We named ours "MailChimp Pop-up" back in step 15.)
- Click Save.
25. Additional tips from MailChimp to consider.
- Fields that are required in your list are not automatically marked as required on the pop-up signup form. Mark fields as required in the Fields tab.
- Group fields can be required on the pop-up signup form. This isn't an option on our hosted or embedded signup forms.
- Set the Overlay Opacity from 1–100, where lower values are more transparent and higher values are more solid. Use only numbers — the setting won't work if you use text or other characters, like %. If you leave the Overlay Opacity field blank, the pop-up will default to something that works for most sites.
- Make sure you customize your form's related pages and response emails.
- To help prevent fake signups, you can add reCAPTCHA confirmation to your pop-up form in your list's settings.


